Kenton MIDI Retrofit Installation Manual
Kenton Electronics · kentonuk.comFor removal instructions, see Kenton interface removal, ChromaTalk October 2009.
Note: This kit should only be installed by a competent service engineer
Kit should contain:
- One larger PCB (Digital board)
- One smaller PCB (Analogue board)
- Large pack of fitting components (Leads etc.)
- Small pack of fitting components (Screws, MIDI sockets etc.)
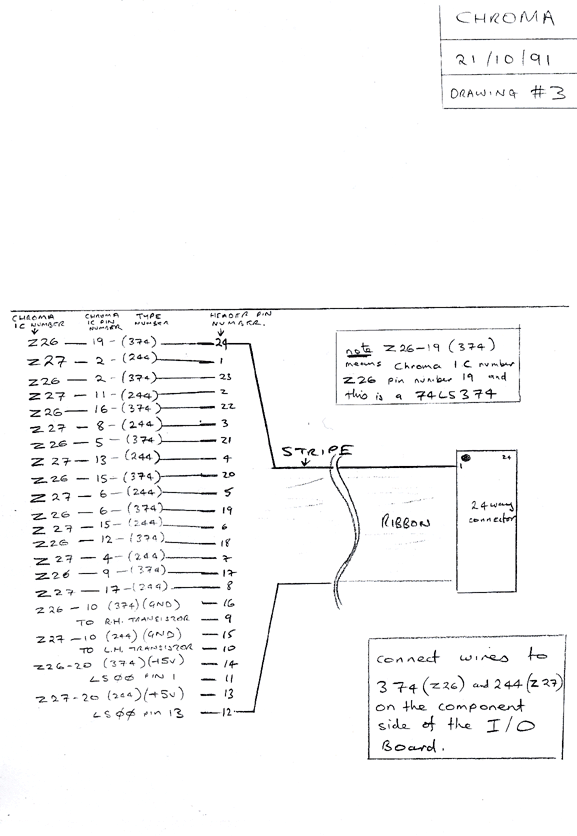
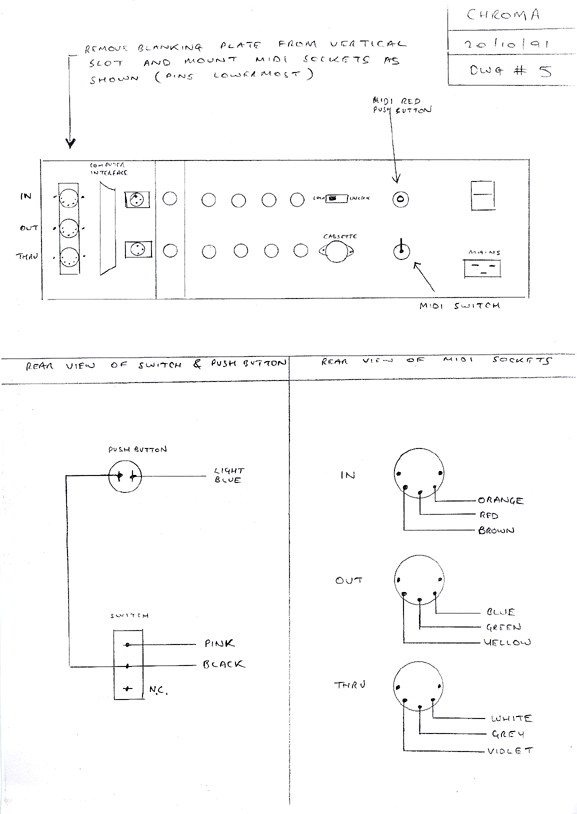
WARNING: GET THE WIRING RIGHT!
- It is extremely important that you install this kit correctly
- Use the drawings and call us if there is any doubt
- Both the MIDI boards, and synths can be damaged if installation is incorrect
- Both fail in characteristic wasy. Repairs are expensive and avoiable
You know that the synth worked before you started, we always supply boards which have been tested and we know to be working.
If you return a board 'not working' we can tell what has happened to it
NB. Please take extreme care not to alter any of thp resets situated near the mounting position of the MIDI boards in the base of the synth. Any adjustments will resul in the synth performing unpredictably.
TEL: +44 (0)181-337-0333 FAX: +44 (0)181-330-1060
E-MAIL: tech@kenton.co.uk WWW: www.kentonuk.com/
E+OE. - INSTRUCTIONS COPYRIGHT KENTON ELECTRONICS 1997 ![]()


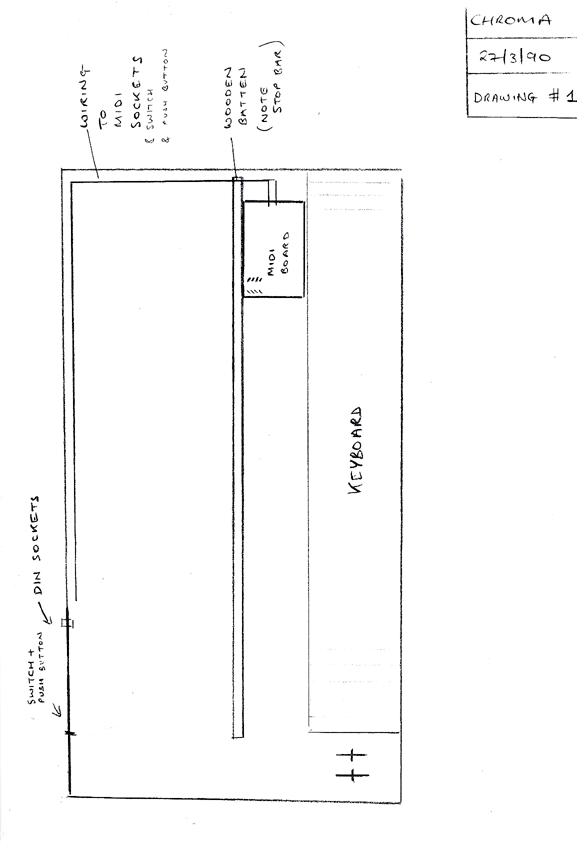
See Chroma 21010104 for back panel photos of this modification installed.


